

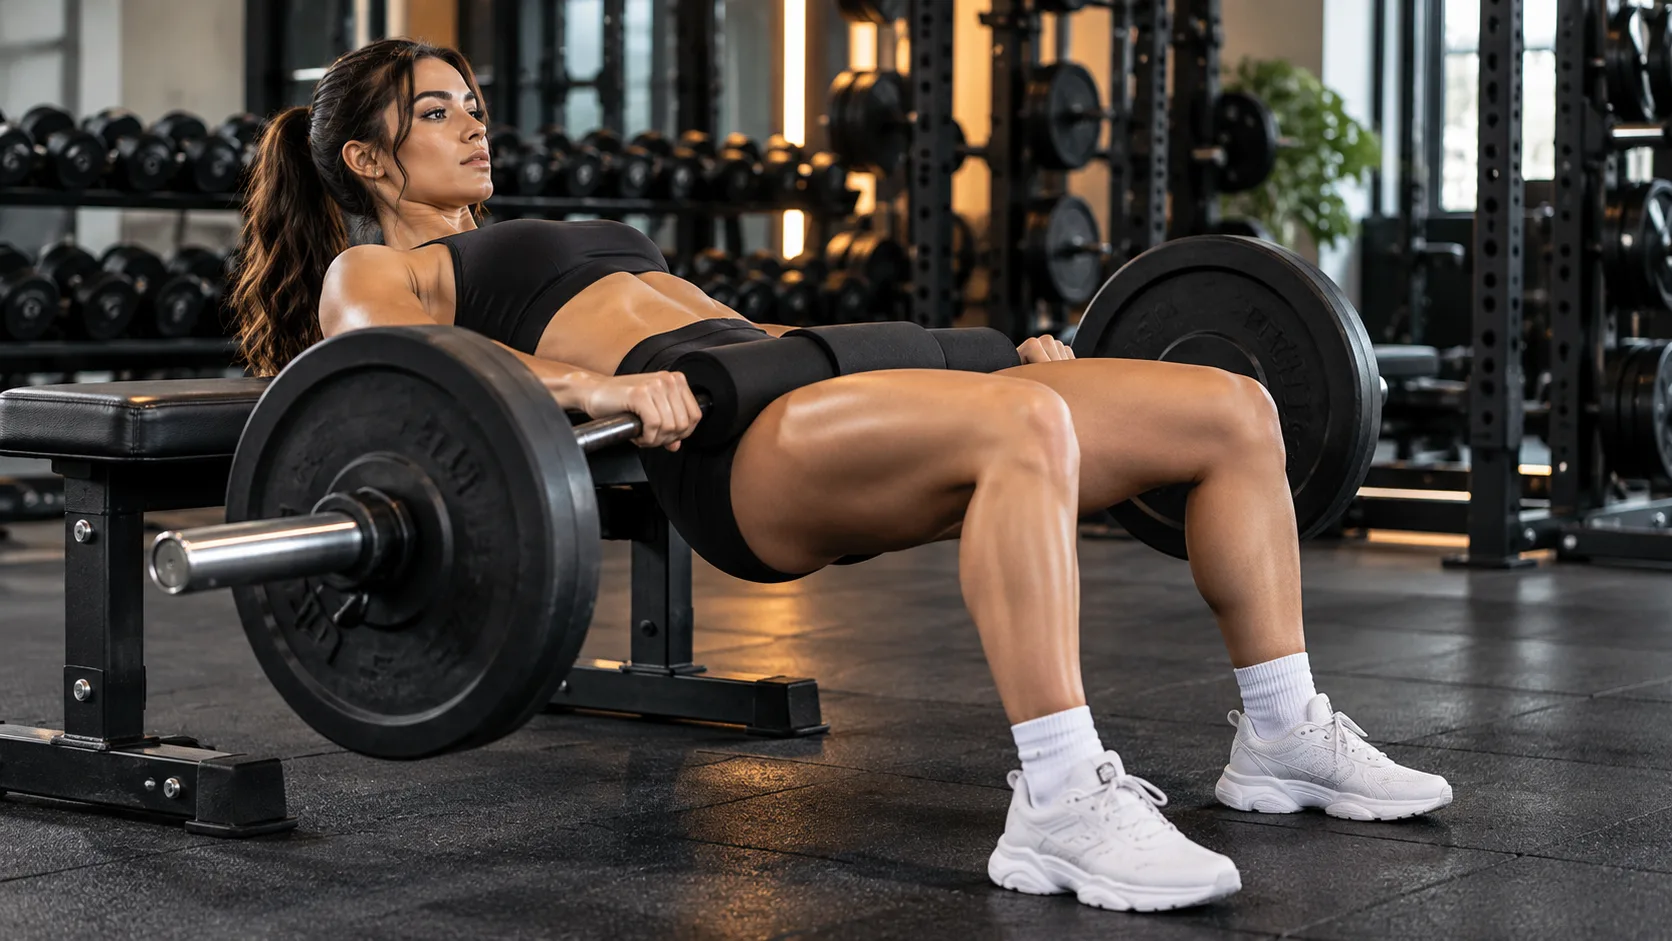
Hip thrusts are a popular lower-body exercise that helps strengthen the gluteal muscles, improve hip extension, and support everyday movement. Whether you’re new to strength training or looking to improve your exercise technique, learning the correct hip thrust form is essential. Performing the movement with proper alignment can help you exercise more comfortably while reducing unnecessary stress on your lower back.
Understanding how to do hip thrusts correctly begins with learning the basic movement, positioning your feet, and controlling your hips throughout each repetition. You can start with bodyweight hip thrusts before exploring more challenging variations when appropriate. This guide explains the step-by-step technique, muscles worked, common mistakes, benefits, and practical tips for performing hip thrusts safely.
What Are Hip Thrusts and How Do They Work?
Hip thrusts are a strength-training exercise that involves extending your hips while supporting your upper back against a stable, elevated surface. The movement primarily targets the gluteal muscles, which help control hip extension and stabilize the pelvis. Unlike many standing exercises, hip thrusts allow you to focus directly on controlled hip movement.
During a hip thrust, your feet remain planted on the floor while your hips move upward from a lowered position. Your upper back stays supported against a stable bench or suitable padded surface. As your hips rise, the gluteal muscles contract to extend the hip joints and support the movement.
Hip thrusts can be performed using bodyweight or suitable resistance, depending on experience and individual needs. Beginners should focus on learning controlled movement before considering additional resistance. Understanding the exercise mechanics helps you maintain proper alignment and avoid relying excessively on your lower back to complete each repetition.
What Muscles Do Hip Thrusts Work?
The gluteus maximus is the primary muscle involved in hip thrusts because it produces much of the force required to extend the hips. This large muscle supports movements such as standing up, climbing stairs, and walking uphill. Performing hip thrusts with proper technique helps strengthen this important part of the lower body.
The gluteus medius and gluteus minimus also contribute to hip and pelvic stability during the exercise. Your hamstrings assist with hip extension, although their contribution depends on knee position and other movement factors. The quadriceps help maintain knee positioning while your feet remain firmly supported on the ground.
Your abdominal muscles and surrounding trunk stabilizers also play an important role during hip thrusts. These muscles help control torso positioning and limit excessive spinal movement throughout each repetition. Although hip thrusts primarily target the glutes, they require coordination between several muscle groups to maintain comfortable and controlled movement.
Benefits of Doing Hip Thrusts Correctly
One of the main benefits of hip thrusts is improving strength in the muscles responsible for hip extension. These muscles contribute to everyday activities involving standing, walking, and climbing stairs. Strengthening them through controlled resistance exercises can support lower-body function and complement other movements within a balanced fitness routine.
Hip thrusts can also help people develop better awareness of how their hips and pelvis move. Learning to extend the hips without excessively arching the lower back encourages more controlled exercise technique. This awareness may be useful when practicing other strength-training movements that involve coordinated hip and trunk positioning.
Another advantage is that hip thrusts can be adapted to different experience levels and physical abilities. Bodyweight versions allow beginners to practice the movement without added resistance, while other variations can introduce suitable challenges. Their flexibility makes hip thrusts a useful exercise option when performed with appropriate equipment and comfortable technique.
How to Set Up for Hip Thrusts Properly
Begin by choosing a stable exercise bench or padded platform that will not slide, tip, or move during the exercise. The supporting surface should allow your upper back to rest comfortably against its edge. Avoid lightweight furniture or unstable chairs because unexpected movement can interrupt your balance and cause discomfort.
Sit on the floor with your back facing the bench and your knees bent comfortably. Position the lower portion of your shoulder blades against the padded edge while keeping your head and neck relaxed. Place both feet flat on the floor, approximately hip-width apart, with your toes pointing naturally forward.
Before beginning the movement, check that your footwear provides stable contact with the floor and that your feet will not slip. Keep your hands resting comfortably near the bench or your torso for balance. Practice the starting position without lifting your hips until you feel confident that your setup is secure.
How to Do Hip Thrusts Step by Step
Start in a seated position with your upper back supported against the bench, feet flat, and knees bent. Gently engage your abdominal muscles to maintain a steady trunk position. Keep your chin relaxed and your gaze generally forward rather than tilting your head backward as you prepare to move.
Press evenly through your feet and lift your hips upward by extending them in a controlled motion. Allow your upper back to pivot comfortably against the bench while your torso rises. Continue until your shoulders, hips, and knees form an approximately straight line without forcing your lower back into an exaggerated arch.
Pause briefly at the top while maintaining a comfortable glute contraction and steady breathing. Slowly lower your hips toward the starting position without dropping suddenly or losing control. Repeat the movement at a manageable pace, focusing on smooth hip extension and consistent alignment rather than completing repetitions as quickly as possible.
Proper Hip Thrust Form and Body Alignment Tips
Correct hip thrust form begins with maintaining a stable relationship between your feet, knees, hips, and upper body. Your knees should generally follow the direction of your toes rather than collapsing inward. Keeping both feet planted helps distribute pressure evenly while providing a dependable base for the movement.
At the top of the exercise, aim for full, comfortable hip extension without arching your lower back excessively. Your torso should align approximately with your thighs while your abdominal muscles help maintain pelvic control. If your lower back feels compressed or uncomfortable, reduce the lifting height and reassess your positioning.
Your head and neck should move naturally with your torso instead of being thrown backward during each repetition. Keep your shoulders comfortable against the supporting surface and avoid unnecessary upper-body tension. Small adjustments to foot placement and bench position can help you find a movement pattern that feels stable and controlled.
How to Breathe and Control Your Hip Thrust Movement
Breathing correctly during hip thrusts helps maintain rhythm and reduces unnecessary tension throughout the exercise. Inhale naturally before beginning the lifting phase and exhale as you extend your hips upward. Continue breathing comfortably rather than holding your breath for extended periods, especially when practicing the movement for the first time.
Moving slowly allows you to pay attention to which muscles are working and whether your position remains comfortable. Avoid relying on momentum to lift your hips because rapid movements can make alignment harder to maintain. A brief, controlled pause at the top can help you recognize the completed movement before lowering.
During the lowering phase, allow your hips to descend gradually while keeping your feet stable. Maintain enough control that the movement feels deliberate instead of allowing your body to drop suddenly. A consistent pace makes it easier to recognize fatigue, correct positioning, and stop before technique becomes uncomfortable.
Common Hip Thrust Mistakes You Should Avoid
One common hip thrust mistake is lifting the hips by excessively arching the lower back rather than extending the hip joints. This can shift unnecessary stress toward the lumbar region and make the movement uncomfortable. Focus on gently engaging your abdominal muscles and stopping when your hips reach a comfortable position.
Incorrect foot placement is another problem that can affect balance and muscle involvement during the exercise. Placing your feet too far away may increase hamstring involvement, while positioning them too close can make the movement awkward. Adjust your stance until your knees are comfortably bent and your shins are approximately vertical at the top.
Rushing through repetitions, allowing the knees to collapse inward, and using unstable equipment can also reduce exercise quality. Some people additionally lift their heads excessively or press against the bench in an uncomfortable position. Taking time to review these details helps make hip thrusts more controlled and suitable for your individual abilities.
Hip Thrusts vs. Glute Bridges: What’s the Difference?
Hip thrusts and glute bridges are similar exercises because both involve raising the hips through controlled hip extension. However, their starting positions are different, which changes the available movement range. Understanding these differences can help you choose an appropriate exercise based on your experience, equipment, and comfort.
A traditional glute bridge begins with your back resting on the floor while your knees remain bent and feet planted. You lift your hips while keeping your shoulders supported on the ground. This variation requires minimal equipment and may be easier for beginners who are still learning how to coordinate hip movement.
Hip thrusts use an elevated surface to support the upper back, generally allowing a greater range of hip movement. This can make them useful when progressing beyond basic floor bridges with appropriate technique. Neither exercise is automatically better because both can contribute to glute strength when selected for individual goals and abilities.
Beginner-Friendly Hip Thrust Variations to Try
Bodyweight hip thrusts are a suitable starting point for learning the movement without managing additional resistance. They allow you to focus on foot placement, breathing, and controlling your hips through a comfortable range. Beginners can practice a small number of quality repetitions before deciding whether to continue or take a rest.
Floor glute bridges are another helpful option when using an elevated bench feels unfamiliar or uncomfortable. With your back supported on the ground, you can practice lifting and lowering your hips in a simpler position. This variation may help develop movement awareness before progressing to a supported hip thrust.
A brief pause at the top of a bodyweight hip thrust can introduce a modest challenge without adding equipment. Maintain a comfortable position for a moment before lowering slowly and repeating. More demanding variations involving additional resistance should be introduced gradually with appropriate instruction, especially when you’re still developing exercise technique.
How to Include Hip Thrusts in Your Workout Routine
Hip thrusts can fit into a balanced lower-body strength routine alongside other comfortable movements such as squats, step-ups, and glute bridges. Their main purpose is to strengthen muscles involved in hip extension. Combining different movement patterns can help support general strength and mobility without concentrating every workout on a single exercise.
If you’re new to hip thrusts, begin with a manageable amount of bodyweight practice and prioritize controlled repetitions. Take breaks when your muscles become tired, and allow appropriate recovery between demanding sessions. There is no need to complete excessive repetitions or practice through discomfort to benefit from learning the movement.
As your confidence improves, you can adjust your routine based on comfort, technique, and available guidance. A qualified fitness professional can help determine when different variations or additional resistance are appropriate. Progress should reflect steady skill development rather than pressure to increase difficulty before you’re comfortable with the basics.
How to Tell if You’re Doing Hip Thrusts Correctly
A well-performed hip thrust should feel controlled, with noticeable muscular effort around the hips and glutes rather than sharp pain. You should be able to raise and lower your hips without losing balance or shifting unexpectedly. Your feet should remain grounded, and your knees should maintain a stable, comfortable position.
Pay attention to whether your lower back is doing more work than your gluteal muscles. If you repeatedly feel uncomfortable pressure in your spine, your lifting height or pelvic positioning may need adjustment. Reducing the range of motion or returning to floor glute bridges can make the exercise easier to control.
Observing your technique from the side with assistance from a qualified instructor can help identify alignment issues. Look for an approximately straight line between the shoulders, hips, and knees at the highest comfortable position. Avoid judging technique by how high your hips rise alone, because controlled movement matters more than exaggerated extension.
When Should You Modify or Stop Hip Thrusts?
Hip thrusts should not produce sharp pain, numbness, or uncomfortable pressure in the lower back, hips, or knees. If these symptoms occur, stop the exercise rather than repeatedly attempting to push through them. Changing your position or choosing a gentler movement may be more appropriate until the reason for discomfort is understood.
People recovering from injuries or managing ongoing joint problems may require individualized exercise guidance before attempting hip thrusts. A physiotherapist or qualified healthcare professional can assess which movements are suitable for their circumstances. Depending on the condition, a smaller range of motion or an alternative exercise may feel more comfortable.
Fatigue can also affect movement quality, particularly when your hips begin dropping unevenly or your trunk becomes difficult to stabilize. Rest when your technique starts changing instead of forcing additional repetitions. A comfortable, controlled exercise experience is more valuable than continuing when your body no longer maintains the intended movement pattern.
Conclusion
Learning how to do hip thrusts correctly begins with understanding the exercise setup, foot positioning, and controlled hip extension. Supporting your upper back against a stable surface and maintaining comfortable trunk alignment helps make the movement more consistent. Focusing on technique rather than speed allows you to recognize how your gluteal muscles contribute to each repetition.
Hip thrusts can support lower-body strength, improve awareness of hip movement, and complement other exercises within a balanced routine. Beginners can start with bodyweight variations or floor glute bridges before considering additional challenges. Proper breathing, steady movement, and appropriate recovery are important for maintaining comfort throughout the exercise.
The best hip thrust routine is one that matches your abilities and allows you to practice without unnecessary pain or pressure. Take time to adjust your setup, observe your form, and seek guidance when something feels uncomfortable. With consistent, controlled practice, hip thrusts can become a useful part of your overall strength and movement routine.
Frequently Asked Questions (FAQs)
How do beginners do hip thrusts correctly?
Beginners should start with bodyweight hip thrusts using a stable bench, feet planted, and upper back supported. Lift the hips slowly, maintain comfortable alignment, and lower with control without excessively arching the back.
What muscles do hip thrusts work?
Hip thrusts primarily strengthen the gluteus maximus, which supports hip extension. The hamstrings, other gluteal muscles, quadriceps, and trunk stabilizers also contribute to movement and balance during the exercise.
Are hip thrusts better than glute bridges?
Neither exercise is automatically better. Hip thrusts generally allow a greater range of motion using an elevated surface, while floor glute bridges provide a simpler option that may suit beginners.
Why do I feel hip thrusts in my lower back?
Lower-back discomfort may occur when you arch excessively, lift beyond your comfortable range, or lose trunk control. Stop if the movement hurts, adjust your technique, and seek professional guidance if discomfort continues.
Can you do hip thrusts without weights?
Yes, bodyweight hip thrusts are a useful way to practice proper technique and strengthen hip extension muscles. Additional resistance is not necessary for learning the movement, especially when you’re beginning strength training.